Eating on the Three Capes Track
I decided to walk 46km through the gorgeous Tasman National Park. What to eat, considering I’d have to carry everything in a backpack aiming for less than 11kg total weight?
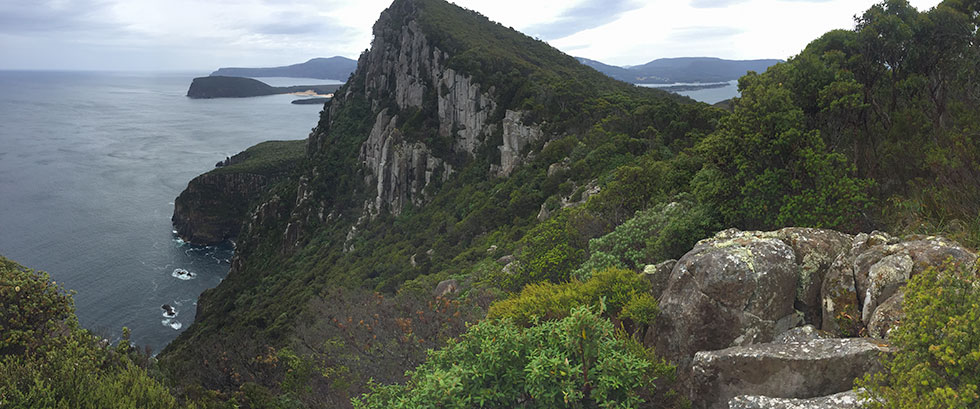
Last year, on a trip home to Australia, I sat in a cafe with a friend who had just finished a walk I’d never heard of. “It’s the Three Capes Track, it’s brand new, and it’s amazing”, she said.
The spectacular nature shots on her phone were convincing, but so was everything she had to say about the less photogenic parts: a well-graded path, comfortable huts, excellent cooking facilities, well-stocked bookshelves, knowledgeable rangers. It sounded like the perfect hike for someone who enjoys beautiful & remote environments, but isn’t looking for an enormous physical & logistical challenge.
Mid-year, I started planning to do the hike on my next trip back. I rounded up a couple of siblings and got us all booked in for a mid-January departure, finishing on my birthday. None of us are hugely experienced hikers. I’d done one recent 5 day hike in Sweden, and not much else since my teens. My siblings are regular day-hikers, but packing for a multi-dayer was something new.
I planned & prepared food for myself & one sibling (the other preferred to cook for herself). We are both omnivores, and I am currently under gluten-free orders (I still eat oats & am not strict on thickeners/starches/additives). We decided we were comfortable eating pasteurised cheese away from refrigeration for a couple of days.
My packing strategy is zip-lock bags all the way down: huge ones containing lots of medium ones that contain lots of small ones. Each labelled, and representing a discrete meal, snack or object (what few clothes I take also go into zip-lock bags).
There was a breakfast bag, with the oats and the coffee sachets. We each carried our own lunch bag. Dinners were broken up into their own labelled zip-lock bags & we shared them between our packs. I didn’t weigh the food component of my bag separately, but my total bag weight at start was 11kg, including water- this was perfectly comfortable to carry, and dropped rapidly as we ate our way through the supplies.
For eating, we each carried a camping bowl, a nifty silicon folding cup, a plastic fork and a plastic soup spoon.
Food was sourced from Coles, Woolworths and a camping supply store.
Three Capes Track 4 day/3 night gluten-free hiking menu
**: These are the things I wish I’d brought more of
Breakfast: Coffee & oats
- 2x instant cappuccino sachet each per day. Total: 12 sachets
- Oats for 6 breakfasts (all ingredients combined in a zip-loc bag):
- 300g gluten-free oats, blitzed in a blender in an attempt to make them smaller & more “instant”
- 2/3 a cup of milk powder
- pinch salt
- 1/2 cup coconut shreds- not the tiny ones used for baking, the bigger flakes from the health food section
- 1/3 cup each sliced & pitted dried dates, apricots & apples
Planned preparation: Empty half a cup of mix into a bowl, pour boiling water over, stir for a minute.
Better preparation: Add two servings worth to a saucepan of boiling water, stir over heat for a minute or two until it softens & thickens to a nice porridge consistency.
How was it?: It was OK, but to be honest trying to make instant oats out of the only gluten-free-labelled oats I could find in Australia, which were big chewy whole grains, was not a great success. Even after a go round the food processor, they didn’t cook through just by adding boiling water. If you’re not stuck in gluten-free land, this breakfast works much better with regular instant oats from the supermarket.
Lunch: Tuna & crackers
- 1 tin of tuna per person per day. Total: 6 tins of tuna
- 1 sachet of Kewpie mayonnaise, pinched from a Sushi Train restaurant, per day. Total: 3 sachets of mayonnaise**
- 1 packet of Mary’s Gone Crackers gluten-free seed crackers
- 1 packet of regular crackers. Total: 2 packets of crackers
- 1 carrot per person per day. Total: 6 carrots
- 1 Nutella snack thing per person per day. Total: 6 Nutella things
- 1 Mini Babybel cheese per person per day. Total: 6 mini cheeses**
How was it?: It was awesome, except for the time we dropped a full, open can of tuna in a huge puddle of rainwater while perched on the edge of a cliff. Also, smallish whole carrots turn out to be great lunchtime snacks.
Dinner One: Chicken Tom Yum Soup
- 1 sachet of gourmet instant Tom Yum soup
- 1 zip-lock bag containing 1/3 cup coconut milk powder + 1/2 packet of dehydrated peas
- 2x cans of springwater canned chicken, a delight yet unknown in Swedish supermarkets but readily available in Australia
- 2 single-serve bundles of rice vermicelli noodles
Preparation: Empty contents of Tom Yum soup sachet & zip-lock bag into a saucepan with a bit of water. Bring to boil. Once peas are looking rehydrated, add vermicelli noodles & boil for a minute or so. Add cans of chicken & serve.
How was it?: Pretty good. The vermicelli noodles turned out a bit sludgey, and it would definitely have benefited from more vegetables than just peas, but the tom yum soup base & coconut milk were a tasty combo.
Dinner Two: Beef Pad Thai
- 1 sachet of pad thai sauce
- 1 zip-lock bag containing 1/2 cup dehydrated peas + 1/2 cup dried shiitake mushrooms
- 1/2 packet of freeze-dried ground beef from the camping store- like this
- 2 single-serve bundles of rice vermicelli noodles
Preparation: Bring a saucepan of water to boil. Pour some over vermicelli noodles in a separate saucepan or bowl to cook. To the remaining hot water, add ground beef & contents of zip-lock bag. Leave until beef & veggies are rehydrated, around 10 minutes. Drain excess water if it hasn’t been absorbed. Drain vermicelli noodles, add to saucepan with meat & veggies, add pad thai sauce.
How was it?: Meh. I didn’t road test the pad thai mix before the hike, and I wouldn’t have taken it along if I had. It was kind of bland and sweet. Was also pretty sick of rice vermicelli noodles at this stage.
Dinner Three: Beef & bean quinoa chilli
- 1 packet of this quinoa & dehydrated bean mix that I found in the gluten-free aisle at Woolworths
- 1 sachet of tomato paste
- 1/2 packet of freeze-dried ground beef
Preparation: Put in saucepan with ground beef 3 cups of water, simmer for about 20 minutes.
How was it?: It was really, really tasty. It takes longer to cook than I’d like for camping food, which was fine for this particular walk as you’re not carrying gas canisters or trying to cook on a wobbly rock (it might be a good candidate for “add boiling water to insulated container” type cooking). It had some mildly undesireable intestinal consequences in the following days.
Trailmix
Before I hike, I prepare a small zip-lock bag per day of customised trail-mix. For this hike, each bag contained:
- Sultanas
- Peanuts, roasted & salted
- Almonds, roasted & unsalted
- Cashews, honey-roasted
- Crunchy chickpeas
- Skittles
- Choc-coated sultanas & peanuts
- 1 gin-gin per day
How was it?: So, so good. Finished the bag every day. Converted one sibling to a total gin-gin fiend, and formed a skittle-based market economy within the group by day 2.
Extras
- A wheel of cheap supermarket brie & a handful of crackers for celebrating our arrival at the first hut. This was an excellent idea & one I heartily recommend
- Tea bags, a handful of assorted. Should have brought way more, as long afternoons in the huts really suit a nice cup of tea
- Small zip-lock of milk powder. For the tea, but wound up being combined with Nutella & hot water to make ‘hot chocolate’. Obviously should have brought hot chocolate sachets also
- Half a packet of gluten-free shortbread, to go with the tea
- Six mini cupcakes my friend baked for me, which I saved until my birthday
- A lil 50ml bottle of whisky for toasting the eve of my birthday
- A couple of strips of homemade jerky, a gift from a sibling who wasn’t able to join us
Cooking & eating in Australia’s fanciest hiker huts
Kitchen facilities on the trail are excellent, but it can get crowded, so it’s still a good idea to plan for minimum prep and cooking time.
Kitchens don’t have knives, so if you’re packing something you need to chop up, bring your own knife.
Kitchens do have sinks with running water and drains, spaghetti strainers, vegetable peelers, fry pans, saucepans and many other luxuries.
You’ll carry out all your own trash (bar what you decide you can reasonably put in the tiny food scrap bins), so take off all extra layers of packaging before you go, and bring trash bags.
Because you don’t have to carry a full load of camping gear, there is some delightful scope for carrying luxuries (like wheels of brie, fresh vegetables, and birthday cupcakes). I’d still recommend going for a minimum food weight menu, and make those luxuries count, because the lighter your pack, the happier you’ll be, all the way along.
There were days when I carried way more water than it turned out I needed- I really didn’t need 2L for the 5km track on the first day. Knowing that you can refill your water each time you pass a hut, think carefully about how much you really need at a time. The only day I needed my full 2L capacity was on the last day, which is 17km without opportunities to refill.
The gift shop at Port Arthur before you leave has a small selection of specialist hiking food. It’s too expensive & last-minute to plan on using it as your main food supply, but they have some stuff like packets of dehydrated mixed vegetables which would make an excellent addition to a menu.
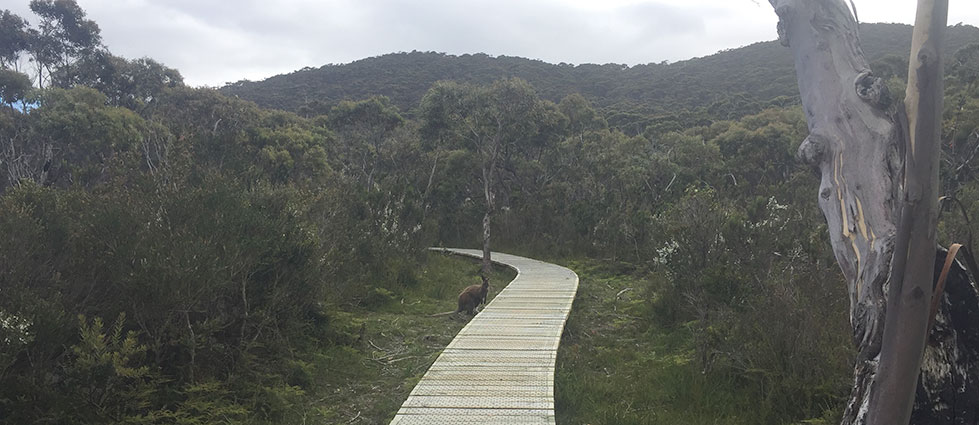
The track is every bit as thoughtfully produced as my friend had raved about, and it absolutely lives up to the hype of a multi-day hike for people who want to see some of Tasmania’s most stunning wilderness without needing masses of experience and equipment. If I were to do it again, I’d avoid going in the school holidays (the beautiful wooden eco-lodges turn into giant xylophones with the constant thudding of all those little feet on the boardwalks), I’d take my knitting for whiling away the long afternoons in the huts, and I’d do each day’s walks at a much slower pace. It’s a truly spectacular stretch of coastline, and knowing that you’ll have somewhere warm and dry to cook your dinner and sleep at the end of each day, the luxury of taking it easy should be enjoyed.
If you enjoyed reading this, or have hiking food tips you’d love to share, let me know on Twitter.